Friday, January 22, 2016

Israeli Couscous with Chicken, Peas and Carrots

Took a while for this one to get the official stamp of approval but it passed the test so here is another one for the healthy meal file!


I made this last minute and forgot to charge the Nikon so there aren't many photos to share so we will just jump right to the recipe!

Here is what you need:

  • 1 tablespoon olive oil
  • 3 cloves minced garlic
  • 8 oz israeli couscous
  • 1 cup peas
  • 1 cup chopped shredded carrots
  • 2 cups chicken broth
  • 1 teaspoon garlic powder
  • 1 teaspoon onion powder
  • 2 teaspoons smoked paprika
  • 2 cups diced cooked chicken

Here is what you do with it:

1. add oil to a large skillet over medium heat, add couscous and garlic and saute for 5 minutes
2. add peas, carrots, chicken broth, garlic and onion powder, paprika, salt and pepper
3. bring to a boil then reduce heat to simmer until liquid is absorbed..about 8 minutes
4. remove from heat and fold in chicken

I chose to serve these in pita bread with some red pepper hummus spread inside


Sunday, January 17, 2016

Creamy Spinach Fettuccine


With the start of the new year lots of people try to make healthier choices in their meals, and hopefully doing so without sacrificing taste!  So I will be doing my best to help out by posting some good tasting and healthier dishes.  How my usual process works is that I find a recipe, make it, take some pictures and find some taste testers to get feedback.  Based on the feedback I receive I either post it as is or make some adjustments and retest before posting.  So in the end you end up with a recipe that gets approval from someone other than just me!

Today we start with Creamy Spinach Fettuccine which in the end comes in just under 300 calories per 1 1/4 cup serving.

Lets get cooking...


Start by sauteing your garlic and shallots in some olive oil in a large skillet


Then whisk in your broth slurry and milk bringing to a boil


Add your fresh spinach....


....until it wilts down


Add in your cooked fettuccine


Toss it all to coat the pasta


Plate and eat!


Here is what you need:

  • 8 ounces fettuccine 
  • 1 tablespoon olive oil
  • 1 large shallot
  • 3 cloves minced garlic
  • 1/4 cup vegetable broth
  • 1 tablespoon all purpose flout
  • 1 cup milk
  • 10 ounces of spinach (can be less is you can't find a 10 ounce bag)
  • 1/4 teaspoon salt
  • 1/8 teaspoon pepper
  • 1/4 teaspoon garlic powder
  • 2 tablespoons chopped fresh parsley
  • 1/4 cup grated parmesan


1. Cook pasta in salted water
2. Heat olive oil in a large skillet over medium-high heat
3. Add garlic and shallots, cook for a couple minutes
4. Combine the vegetable broth and flour in a small bowl, whisk to combine
5. Add broth slurry and milk to skillet and whisk until it comes to a boil
6. Add fresh spinach to skillet and reduce heat to medium, cook for a few minutes until spinach is wilted
7. Add salt, pepper, garlic powder and parsley
8. Turn off the heat and add the parmesan and fettuccine tossing until pasta is well coated

** you can substitute whole wheat pasta
** this dish can be pared with various proteins like..shrimp, chicken, steak..etc

Sunday, January 3, 2016

Cashew Chicken Pasta Salad


I have made this pasta salad multiple times over the years and it always seems to be a hit.  I only made one minor tweak to the original recipe to help cut down on some of the sweetness.

For this recipe I made my own farfalle pasta...because that's just how I roll! If you are a little less ambitious feel free to use a box of dried farfalle...I won't judge you!


Toss the bulk of the ingredients into a bowl and mix it up!


Here is the recipe:

Toss the following into a large mixing bowl
  • 1 pound of cooked farfalle pasta
  • 4 Cups cooked chicken (cut into bite sized cubes)
  • 1 20 oz can of drained pineapple tidbits
  • 1 cup diced celery
  • 1/2 cup sliced green onions
  • 1 cup seedless grapes (any mix of color)
  • 1 6 oz package of dried cranberries

In a smaller bowl mix the following:
  • 1 cup ranch dressing
  • 1/3 cup miracle whip
  • 1/3 cup real mayonnaise


Now add the dressing mixture into the large bowl and stir to combine

If you are going to be eating the salad right away go ahead and 2 cups of cashews,  if not wait until just before serving to add them so they don't become soggy.

Wednesday, December 30, 2015

Spaghetti and Meatballs!


I have always loved Italian food...be it the classical dishes from the boot or the many Italian-American version of dishes almost all of us grew up with.  When living in Arizona there was a great Italian restaurant just around the corner from our apartment that had a special deal every Monday and Tuesday on spaghetti and meatballs.  I have experimented with many recipes trying to replicate the flavor of their meatballs and the following recipe is the one that I believe to be the best of the bunch.

This recipe uses a mixture of beef, pork and veal....the last being the magic ingredient that gives the flavor notes that always seemed to be missing in any other recipe that I tried.

After mixing and forming the meatballs into the desired size you want to brown them on all size in a little bit of olive oil


After you have them all browned you want to let them simmer in your favorite pasta sauce for about 45 minutes


Then you are left with a batch of great tasting meatballs that you can decide how to use them...on spaghetti, a great meatball sub, or even just eaten alone covered with some sauce


Here is the recipe.....


  • 1/2 pound ground beef
  • 1/2 pound ground pork
  • 1/2 pound ground veal
  • 2 large eggs
  • 1/4 cup grated parmesan cheese
  • 4 cloves of minced garlic
  • 1/4 cup plain dry breadcrumbs
  • 1/4 cup chopped flat leaf parsley
  • salt and pepper


Mix all of that into a bowl and form into meatballs of desired size.  I use a disher so that I get a uniform size for even cooking.

Heat up a large skillet over medium heat and add 1 cup of olive oil to the pan.

Brown the meatballs on all sides, you are just browning them and not cooking all the way through

Add browned meatballs to a dutch oven or sauce pot over medium low heat with enough pasta sauce to cover and let them simmer for about 45 minutes.

**For those in the Janesville area the only place I have been able to find fresh ground veal is at Festival Foods.  Sorg's Meat Market on Hwy 14 between Janesville and Darien carries frozen packages of ground veal that also work well

Thursday, November 26, 2015

Kielbasa Bites

Here comes another super quick party appetizer recipe.,,,Kielbasa Bites!  This dish takes only about 10 minutes to toss together and you are done.

Add applesauce, brown sugar, garlic, and red pepper flakes to a bowl and whisk it up


Dice up an apple and cut kielbasa into bit sized pieces, add to the bowl and mix it up


Transfer all that to a slow cooker and set to high for 6 hours


The amounts in the recipe fit perfectly into my mini 1.5 qt slow cooker, but if you have a bigger crowd you can easily just adjust the amounts and use a larger slow cooker.

Here is your recipe:


  • 1 pound kielbasa (cut into bite sized pieces)
  • 1 apple (diced)
  • 1/3 cup unsweetened applesauce
  • 1/2 cup brown sugar
  • 1 clove minced garlic
  • pinch of crushed red pepper flakes (optional)


  • mix applesauce, brown sugar, garlic and pepper flakes in a bowl
  • add apple and kielbasa, toss to coat
  • add mixture to slow cooker and set to high for 5 hours

Wednesday, November 11, 2015

Time to talk equipment - Knives

I'm going to change it up a bit and start to introduce some information on equipment....mostly what I use in my kitchen...hopefully some of you will find these posts useful.

So the first installment will be about knives, I'm often asked the question "What knife set should I buy?"...well my answer is none!!  The problem with sets is that you end up paying more than you need to and it contains a lot of stuff that you just don't need.  Useless items just cause clutter and clutter is the last thing you want in a kitchen.  So here are what I recommend when asked about knives.


These 4 items will take care of about 95% of your cutting needs...A good 8 or 10 inch chef's knife, a 6 inch flex boning knife, a 3 1/2 inch paring knife and a honing steel.

The honing steel....remember this doesn't sharpen your knifes, it just straightens out the cutting edge on them. You should get in the habit of giving your knife a few swipes across the steel every couple times you pull it out for use.  Also keep in mind that the safest knife is a sharp one, so you should either purchase an electric sharpener or take and get them sharpened at least once or twice a year..every 6 months is a good time frame.  A dull knife requires more force to use and that is when accidents happen.  I use a 10 inch Wusthof steel and it runs between $25-50

The chef's knife....this is your workhorse and will get the majority of the use.  Now there are a wide range of brands and prices when it comes to a good quality chefs knife.  A thing to remember is that high price does not always mean high quality!


Here are 2 examples of what I have..the top one is a very pricey Wusthof ($200+) and the bottom is a super affordable Victorinox ($35)  I can tell you that they both work very well, but the Victorinox is the one I almost always use...its ultra sharp, holds its edge very well and is very comfortable in the hand.  Plus at only $35 if i were to do something stupid and bust the tip off it is very easy to replace.

The paring knife....when the job calls for a small knife you grab the paring knife. Mine is a 3.5 inch Wusthof ($40)  This thing is amazingly sharp...like cutting with a razor blade.  Victorinox also makes a nice 3.75 inch paring knife that comes in around $8, i own one and its great, just not as nice as the Wusthof.

The flex boning knife....this one doesn't get used much but comes in very handy when you need it.  whether you are breaking down a fish or boning out a ham or segmenting a whole chicken.  My choice here is the Victorinox 6 inch ($20)

A few other seldom used knives that you will want to have on hand are a good bread slicer, again I go with the Wusthof Classic 10 inch ($120)...the price is a bit high but you are paying for a quality product here.  The last knife in your set should be a slicing knife, this will be used when you are carving up any cut of meat..from steaks to a turkey.  The granton edge does the best job for cleanly slicing the fibers of the meat for a clean cut with very little tearing.  For that task I turn to the Victorinox 12 inch granton edge slicing knife ($53).

Storage!!....since you are piecing a set together with the best for the job knife you need a storage solution.  some like the magnetic strip, I'm not a big fan of that for a few reasons..one its easy to damage the edge if you take it off the magnet wrong, also a less desirable solution if you have little hands around your kitchen.  So I use a generic knife block from Ikea that costs me about $12


I will end here by talking a little bit about knife care...which is a very important part of keeping your tools in good working order.  Rule #1...NEVER put a knife in the dishwasher!  I can't stress that enough. All you need is a good long handles soft bristled brush and some dish soap to get the job done.


I purchase my dish soap in a very large container..like a gallon i think and just keep filling up a condiment bottle that sits on my sink.  Don't let food particles dry on your knife and wash them as soon as possible after you are done using it.  Never put a knife in a sink full of water, its dangerous to find and also for someone who doesn't know it is in there.

So there you have a little info on how to go about getting a good set of working knives for you kitchen that will make cooking much more enjoyable and safer.  If you would like any more information or recommendation just leave a comment below!

Tuesday, November 3, 2015

Butterfinger Cookies

Need something to do with left over Halloween candy??

If you have some Butterfinger candy bars sitting around that you want to get rid of this is a great recipe, just chop them up in a food processor...if you don't have any candy bars or a food processor you can always pick up a bag of Butterfinger Baking Bits to use.


This is a fairly straight forward cookie recipe and not very difficult to pull off.

Cream the sugar and butter....and add the flour


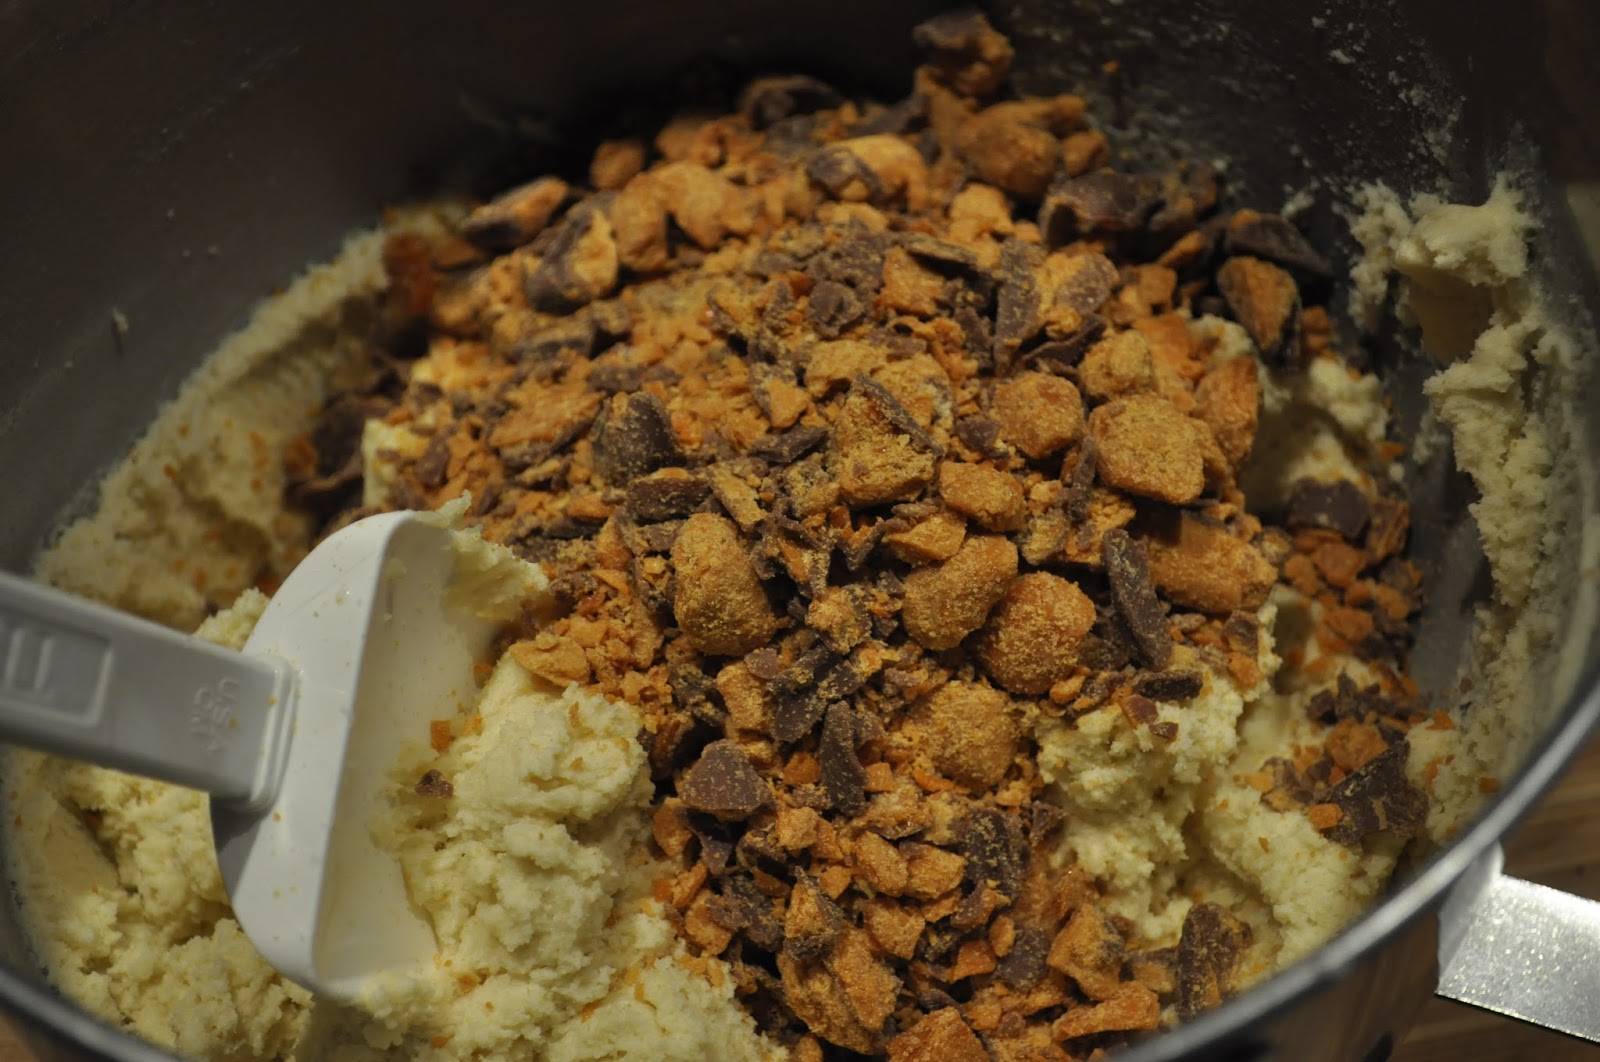
Then fold in the candy


Scoop onto a baking sheet....


Bake, cool, eat!


The recipe cranked out about 40 cookies using my medium disher

Here is the recipe.

Collect the following stuff:
  • 1 cup softened unsalted butter
  • 1 1/2 cups granulated sugar
  • 2 room temperature large eggs
  • 1 1/2 teaspoons baking soda
  • 1/2 teaspoon salt
  • 3 1/2 cups all purpose flour
  • 10 ounces of Butterfinger bits (1 bag if going that route)
Do this with all that stuff:
  • Cream the butter and the sugar
  • Add eggs one at a time, beating to combine
  • Add in the baking soda and the salt, beating to combine
  • Add flour and continue mixing until everything is combined
  • fold in the Butterfinger bits
  • Scoop onto a parchment lined baking sheet
  • Bake in a 350 degree oven for 10-12 minutes
  • Allow to cool for 5 minutes on the baking sheet before moving to a cooling rack
  • If you don't plan on eating them all right away just store in an airtight container or ziplock bag